Fly-Tying Tools: Where Do You Start?
Yes, we all felt the same thing when debating how to get started in fly-tying. Standing in the fly shop and looking at the walls covered in fly-tying materials can be a bit overwhelming. Where do you start? As someone who just recently experienced this, I want to share my solutions and offer a way to make sense of it all.
Let’s start with unanimous tips from almost every fly-tying professional…
1) The better the fly-tying tools, the easier it is to tie flies.
2) The better the fly-tying tools, the more potential you have to tie better flies.
3) Buy the best quality tools and material you can afford; this does not mean the most expensive.
The above tips are dead on. I would like to offer a few more:
4) Take advantage of digital media (i.e. videos, step-by-step photos, specs/ recipes, etc.)
5) Less is more. Tie flies with less material than expected.
6) Keep it simple, especially in the beginning. Flies are created in layers – one layer at a time.
Let’s talk tools…basic tools.
VISE: Almost any vise will work in the beginning. As long as it is secured (doesn’t move too much) and will hold a hook without slipping, you are good to go. Eventually, you may really enjoy a “true rotary” vise – a vise which allows you to rotate your flies exactly along their hook shank. Vises range from $30 to $100 for something reasonable and up to $500 for something engineered with greater precision and materials. I ended up with a “traveler” pedestal vise from Renzetti in matte black – see Renzetti 2300 Traveler (black). It’s small, compact, and very easy to use. It cost approximately $200.
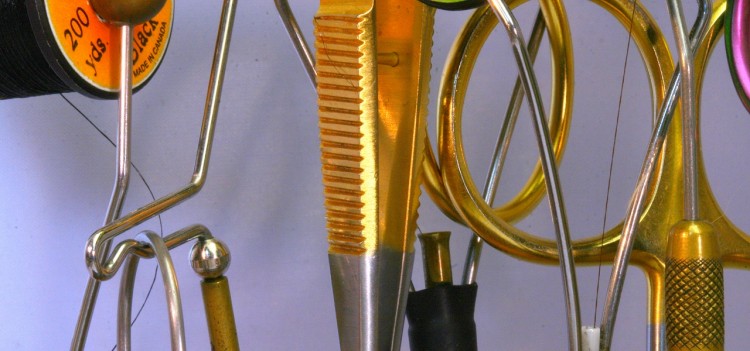
BOBBIN: There are so many different bobbins out there – steel bobbins, ceramic bobbins, ruby bobbins, and more. Again, be careful with inexpensive bobbins (tools). In my case, I bought two inexpensive ($8) bobbins which appeared to have ceramic ends. Didn’t know until after I purchased them, one of the ceramic “donuts” dislodged from the tip. Who would have thought the ceramic portion was actually two ceramic donuts, on at each end. Live and learn. My suggestion you ask? Well, after using a Rite Bobbin, I can’t imagine using anything else, at least at this time. I use the “standard” ceramic Rite Bobbin – very smooth and put together nicely. Here is a reference to the Rite Bobbin (standard). If you find it for less than $30, you’re in good shape. The ceramic tube is smooth enough to thread this bobbin without a threader.
SCISSORS: Having a reasonable pair of scissors makes it so easy to trim materials. Many experts suggest having two sets of scissors, one for the “rough” work and one for the “fine” or precise work. You can find reasonable scissors or nippers (sewing scissors) almost everywhere. Sewing shops will have them too. I use razor scissors by Dr Slick ($25). Dr Slick offers a Lifetime Warranty. Keep in mind, Dr Slick and many other manufacturers make many models for less than $15. I use one pair of scissors, however use a mini set of dikes (jewelry wire cutters) for spooled wire, bead-chain eyes, and other tough materials.
WHIP FINISHER: Not necessary really – your fingers should do perfectly fine. Worst case, pick one up later down the road if you are challenged with the procedure. Here’s a video demonstrating how easy whip finishing can be. I’m sharing this procedure using larger gauge material. Clearly seeing the how the wraps are secured really helps understand what is happening.
BODKIN: I find a bodkin very useful. From coming out hair, fur, and dubbing to manipulating fast drying head cement, a bodkin is a bang-for-the-buck tool. You should not be paying more than $12 for a reasonable bodkin.
HAIR STACKER: This is an important tool – unfortunately, I learned the hard way. I still think they are too expensive for what they offer, so I improvised by finding something else. I use a super smooth 6″ long piece of aluminum tube having a diameter of 5/8″. I believe they are referred to as a tent pole splint. I found mine at REI in the tent section for $5. If you wish to pick up an actual stacking tool, here is a reasonable hair stacker.
DUBBING LOOP: Dubbing a fly seemed a little complicated at first, until I tried it. It is very simply to dub a fly. Learning how to dub a fly offers you an exponential amount of options for being creative. I used a bent paperclip as a dubbing loop the first month I started tying flies. I didn’t want to pay the $15 or $20 for a simple hook and decided to make my own – it worked perfectly. I have since made a nicer version from brass tubing. If you are looking to purchase a simple tool for dubbing, hear is a reasonable dubbing hook.
HEAD CEMENT: From Crazy Glue (Zap-A-Gap) to UV curing goo, there are so many glues/ cements on the market. Another good gel like cement is LocTite Ultra Gel Super Glue. It seems to stay where it’s applied and is easy to work with. I use Sally Hansen’s Pure Hardener. You can pick it up for about $7 at your local drugstore. You may have to wait a few minutes for it to dry, so stick the fly in a wine cork on the back of the bench for a bit. The next time your vise is empty, throw it back in the vise and apply a good second coat.
The information above should offer some insight prior to purchasing fly tying tools. Remember, reasonable fly tying kits (including starter materials) for less than $100 give you enough to start tying, however chances are a majority of the kit will be replaced in due time. Questions or comments? Please feel free to reply to this post below – We will be glad to offer additional advice or information specific to your needs.
See related post titled Fly Tying Materials: Where Do You Start? for suggested materials to get you started tying flies today.


No Comment