Gear Up: Top 15 Tools for the Fly-Fishing Gear Bag


When heading out to fish minutes, miles, or days away, forgetting your gear bag would be catastrophic. For that matter, forgetting any single item may be catastrophic. Ever been in a remote location with straight blistering sun and forget your sunscreen? How about tucked into the Everglades, hours away from your car or the marina and forgot the bug spray. Try a full day of wading the flats without polarized sunglasses!

A solid bag of gear (tools) is essential for an effective and comfortable day of fly-fishing. Anticipating potential weather and environmental conditions plays a huge part in building your set of gear. Below is a list of gear I include in my bag no matter whether I drive or fly to my destination.

THE BAG

GEAR BAG – Start by assessing your current bag or backpack. Has it ever bounced to the back of the boat to then sit in bilge water? Has the sea spray soaked your bag at one time or another? Maybe the bag was simply left in the rain while you were out wading the flats. When assembling your gear, beginning with a waterproof (at least splashproof) bag should be a top priority. For some, making it a backpack may work better. I use my Patagonia Black Hole 30 liter pack for my fly-fishing gear bag. It’s not too big, not too small, it’s tough, and it’s almost waterproof. On occasion West Marine stores will carry this line. If you prefer the duffle bag option, check out the Patagonia lightweight Black Hole 30 liter duffel .

15 TOOLS

WAIST PACK – I’m a less-is-more kind of guy, so I use a Patagonia Stormfront Hip Pack when hopping off the skiff and wading the flats. This pack is waterproof, comfortable, roomy, easy to access, and functional. Of course, the pack is filled with alternate reel spools, boxes of applicable flies, three (3) tapered leaders, pliers, nippers, fishing license, lip balm, snacks, etc. Make sure you always have a small bottle of water in it as well.

ROD(S) – I strap my 4-piece rod tube to the gear bag, for transport.

REEL(S) – Make sure to include any extra reel spools or applicable lines for your trip.

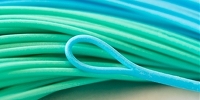
LEADER MATERIAL – I typically carry bracelet spools of 50, 40, 30, 20 pound test in my gear bag. This gives me the option to adjust my leader sections accordingly. As noted above in my waist-pack, I will carry three (3) tapered leaders as a quick go-to solution if I end up losing my full leader for some reason – here you’re trying to avoid the long walk back to the boat to construct another hand-tied leader.

SUNSCREEN – In Southern Florida, don’t leave home without it. I carry a very small amount of sunscreen. I use Neutrogena’s oil-free SPF 110 because it’s small, potent, and feels dry after applying.

BUG JUICE – Having a can AND a pump (liquid) of bug juice is a good idea. I suggest using Repel Sportsmen Max Aerosol (40% Deet) as the main bug spray, however if running out is possible, bring a one ounce back-up pump of Repel 100 (98% Deet). For a super lightweight option when wading, I use the half ounce pump of Repel 100 .

BINOCULARS – I always bring my Leica 10×25 set of binoculars. They are not only used for sighting fish, but also for safety.

WIDE BRIM HAT – Many manufactures make quite a few solid wide brim hats. I use a Simms Solar Sombrero . Great light colors, bungee headband, removable straps, UPF 50+, etc. As light as this hat is, the internal bungee headband is perfect for keeping the hat on in higher winds. This hat can easily be folded and flattened, taking up almost no room in your bag.

SUN GLOVES – When you are out for most of the day, wear sun gloves. Some gloves come with stripping pads to help keep fly line from chaffing. I use Simms Solarflex SunGloves and love them.

NECK GAITER – All it takes is one day of sun on the water and you will never forget your gaiter/ bandana again. The sun’s reflection off the water will nail you. I use a Huk Trophy Fitted Full Face Gaiter . It definitely keeps you cool and is easy to breath through. To me it seems like the HUK gaiter doesn’t choke you as much as the other brands. After a full day of wading, it’s amazing how little sun my face will get. If you are looking to purchase one, remember to stay with neutral light colors.

WASHCLOTH & HAND TOWEL – Bringing both is important. I use one for cleaning and wiping things down. I use the hand towel for drying off.

RAIN GEAR – Always bring your rain gear, no matter how sunny it looks. You will get the occasional showers, however in Florida, the showers can easily bring a downpour having a serious volume of water. Keep in mind, being wet may not be a very big deal in the Summer months – being wet in the Winter months, or on a 40 MPH boat ride back to the marina can be pretty cold. I use Patagonia’s Torrentshell Jacket. It’s part of their H20no series and definitely keeps you dry. Patagonia’s Torrentshell Pant would complete the set. As both are lightweight and easy to pack, I use both for all my outdoor sports/ activities.

CAMERA – It is way too tricky to pull out a phone, or even a camera that is not prepared for the elements/ saltwater. If you want to capture your experience, use a GoPro. It’s made for the water (waterproof), it’s HD, it can take still photos, and it can be mounted or worn on your person. There is a variety of GoPro models. I have the GoPro Hero4 model.

WATER/ FOOD – Always make sure to include a few bottles of water. If you are out for the full day, make sure your dry bag has “at least” four 16 oz bottles. Remember, most people get dehydrated quicker in humid climates, as apposed to arid climates. Throw in a few munchies as well – you’ll be glad you did.

CELL PHONE – Within any reasonable distance of land or civilization, having a cell phone goes without saying. This is a tool used for safety, not to mention an insurance policy of sorts.

Your gear bag has so many important tools in it, I suggest you make this one of your carry-on bags if you choose to fly. You won’t have a fly-fishing trip at all if you check this bag and it gets lost.

OTHER CONSIDERATIONS (OUTSIDE THE BAG)

It is important to mention a few other items (which may not carried in your gear bag) that heavily impact the quality of time spent fly-fishing.

SUNGLASSES – A must-have would be polarized lenses. Polarized lenses allow you to easily see fish below the surface of the water. Bringing two pair is necessary, not only for mishaps and safety reasons, but an amber set usually helps on overcast days. Ideally, a grey and amber set make a good tag team. I currently use Maui Jim’s Haleakala model for sunny days. The wrap-around style, grey Maui Jim optics, and polarization makes a great combo. I also chose this model because of its wire nose bridge – it keeps air flowing and allows for better cooling. Note: You can special order the matte black frame with the grey lenses through any Maui Jim retailer, as I did. This combination is not available in their standard line.

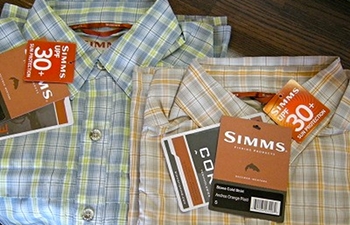
SUN-SHIRT – As I’m a guy who minimizes the mess of sunscreen, I prefer staying covered up when out in the sun. Pelagic’s Vaportek line of UPF 50+ long sleeve sun protection is my go-to shirt. It’s cool in the baking sun, it dries very fast, and is smooth to the touch. This material is great for keeping cool in the heat, however be careful, it snags quite easily. On occasion, I’ll also use light nylon sun-shirts to stay cool and prevent sun exposure. My go-to shirt in the “loose-fitting” category is the Columbia’s Bahama II Long Sleeve Shirt. These are great for staying cool, air-drying quickly, and sun protection (UPF 30+). They also offer a nice windbreak when quickly running to the next hotspot at 40 MPH. Remember to stick with light neutral colors (not white – can spook the fish).

WADING PANTS – Never thought I would ever wear a pair of pants in the water. After taking a closer look at some of the newer lighter materials and how the pants are constructed, I gave them a try. Wearing a pair of these light nylon pants for a full day of kayak fly-fishing really sold me. I use Columbia’s Silver Ridge Convertible Pant. They’re super compact for travel, they’re light, they dry fast, and somehow keep you cool in the hottest part of the day. The convertible feature is always a nice option of course.

WADING SHOES – On the skiff, you may find yourself barefoot or in socks. When jumping into the water to wade flats, you may want to consider protecting your feet. It really depends on your environment. Consider stingrays, coral, sea urchins, etc. In the beginning, I used micro thin neoprene socks and a cheap pair of Canvas All-Star high-tops to wade. Great idea, however cleaning the gear when returning home became cumbersome. Not to mention, garments made of organic materials will house bacteria – better to stick with nylon and other poly materials. I now use Merrell’s Capra Rapid Hiking Water Shoe. I have found this shoe is light, quick drying, and stays cool in our warm water. As expected, Merrell’s sole is also non-marking – boat decks will stay nice and white.

MARINE RADIO – Having a VHF marine radio on hand is another insurance policy. Like we would use a cell phone when close to civilization to reach others for help, a VHF marine radio would be used to find help in locations where only other boats are close by. I use an Icom M73 Handheld. It’s small, offers 6 Watts of power, has an IPX8 waterproof rating, and has some great features. I have used Icom for over 30 years now and have been satisfied with their products from day one.

If you have any suggestions for additional gear/ tools, we want to know about them. Please feel free to comment below and share.

Sun Hats: Simms’ Solar Sombrero

WIDE BRIMMED UPF SUN HATS

Over this last year, I’ve been in the market for a sun-hat. As typically done when looking for new gear, I start my research with on-line reviews and trips to local shops for a little hands-on assessment. Problem is, playing with it in the local fly-fishing shop isn’t going demonstrate much.

The challenge is finding a hat which fully protects you from the sun, keeps you cool, is offered in reasonable colors, is secure in high winds, stays intact after multiple washings, can fold up in the gear bag, and doesn’t look lame when wearing it.

After looking at more than eight of the most functional fly-fishing sun-hats available by many of the top manufacturers in the UPF garment industry, I settled on the Simms Solar Sombrero. For comparison purposes, this hat falls into the “floppy wide brim UPF packable” class of hats. Below are a few highlights on the hat’s functionality after several months of environmental impact.

Sun Protection – The hat truly offers a full 3″ brim. For intents and purposes, the brim sits completely horizontal, offing maximum shade from vertical sun.

Keeps You Cool – The hat is constructed from 100% super-light nylon – it has a very soft and airy nylon feel. Not sure how the top vents, but I stay cool through the hottest part of the day. The super-light nylon upper is nice, especially when I use the upper portion of my sun-hat to store the knot when tying/ securing my Coolibar UPF 50+ Bandana.

Offered in Reasonable Colors – At this time, the Solar Sombrero is offered in Light Grey, Gunmetal, and Tan. For comparison purposes, others may call these Taupe, Putty, and Beige. All colors are light and neutral and coordinate with other major manufacturers of UPF clothing (i.e. Columbia, Patagonia, ExOfficio, Under Armour, etc.). A nice feature on the hat is the black underside of the brim. This dark underside cuts down on additional glare reflecting from the surface of the water.

Secure in High Winds – Still amazed with how this hat holds on in high winds. Simms has built in several ways to secure this hat when worn. A soft elastic band will lightly secure the hat. For higher winds, an additional small gauge integrated bungee can be tightened to provide reasonable holding power. Simms does provide a well made chin-strap/ cord for those who prefer its functionality. If removing this strap/ cord is important (as I typically do), Simms made it very easy to remove. I use a different sort of leash all together.

Wearability – After researching quite a few UPF garments over the last year, I have noticed a common disclosure in the fine print on many manufacture’s tags. The UPF rating is often guaranteed for the life of the garment. Question is, who really defines the “life of the garment”? Most garment tags now state the garment life is defined as 35 washings, or so. We know the garment will last longer – manufacturers are only guaranteeing the UPF rating for up to a specified amount of washings. Remember, in most cases the UPF barrier is applied to the material, not necessarily inherent to the material.

Packability/ Collapsability – For those who love to ravel, having a hat which collapses or folds into tight spaces can be nice. This hat will not only pack completely flat, but will also fold up when needed. I like to keep the super-light foam brim flat – I feel it better maintains the integrity of the hat.

Design – So many hats on the market fluff up in the wind, are too flimsy, are too stiff, or simply look lame. Finding a hat with a progressive look and a design enhanced by its functionality was an added value. After using it for several months, I still find it is the best looking sun protection out there.

Cost – Last but not least, the Solar Sombrero comes in at under $30. If a fly-shop is charging more than $30, they are gouging. Many on-line resources will have what you’re looking for and reasonably priced.

If you have a favorite “floppy wide brim UPF packable” hat perfect for fly-fishing, please share! We all are looking for various functionality in hats – sharing your solutions make Fly Mastery better for all of us.

Flies by Joe Murray


I first connected with Joe Murray over Twitter earlier this month. After exchanging a few fly-tying ideas, he shared with me an image of a unique baitfish fly he tied recently. Joe indicated the baitfish design was an original concept and very effective in South Florida. Fascinated with the fly’s design concept, I requested he send me a few to showcase on Fly Mastery. Joe was kind enough to send me a few additional designs as well. Some examples include:

  • Murray’s Beach Snook Streamer: White
  • Murray’s Backcountry Baitfish: Chartreuse
  • Mangrove Bunny: Chartreuse & Olive
  • Root Beer Gurgler
  • Murray’s Backcountry Baitfish: Chartreuse & Blue
  • Murray’s Backcountry Baitfish: Grey

Joe ties most saltwater patterns and would be willing to sell a few by request. If interested in purchasing any of the referenced flies, pricing is included below.

Pricing

Gurglers are $1.50
Back Country Bait Fish are $2.00
Mangrove Bunnies are $2.00

Other Details

Joe ties all of his saltwater flies with Mustad hooks. If looking for something special, please make sure to inquire first. He will ship any assortment needed.

Shipping

All quantities of 20 flies or less, ship for $3.00 (USPS First Class)
All quantities of 21 flies or more, ship for $5.00 (USPS Flat-Rate 3 day)

Orders typically ship inside of one week. For specific questions, feel free to connect with Joe via Twitter or e-mail.

Joe’s Bio

Joe grew up walking the many tributaries of Lake Erie fishing for Smallmouth Bass, Carp, and Steelhead. Summer vacations would take him to Nags Head, NC where he would walk the beaches spotting schools of Blues making their run toward schools of bait fish. It was during this time he transitioned over to fly fishing exclusively. A career as a school teacher has allowed for extended Summer stays in Fort Meyers, Marco Island, Sanibel Island, and Key West. Locations like this gave him the opportunity to wade flats and kayak the Backcountry for Snook, Redfish, and one of his favorites, Tarpon. This past Summer he landed his first Tarpon from the kayak using one of his latest creations. He continues to fly-fish the Backcountry of the Everglades and crystal clear waters of the lower Keys to feed his addiction – getting Tarpon to eat! Joe is currently sharing his love for fly-fishing by pioneering a fly-fishing club at the school in which he teaches. His motto is: You will always have a friend on the water.

Southern Boys Flies


Pete Colding of Southern Boys Flies was advertising “flies made to order” just the other day. Not only did his line of flies show some creativity, but his pricing was the most competitive I’ve seen. In an effort to show some of this creativity with our readers, I requested he send us a few flies to share. Some examples include:

  • Nail Biter
  • Black Puff
  • Olive Drab Crab
  • Southern Toad
  • Bugger Buddy in Olive

Pete will tie just about any saltwater pattern possible. Popular sellers are crabs, Clousers, toads, Tarpon patterns, Shad, Crappie jigs, Teasers, etc.

Pricing

All Clousers are $1.50
Deceivers, Whistlers, Sea Ducers, Bunnies, and toads are $2.00
All crabs and Half’n Halfs are $2.50
EP fiber flies are $3.00

Other Details

Pete ties all of his saltwater flies with Mustad Stainless Steel hooks. He will ship any assortment needed. All orders over $20.00 are shipped in a foam box. All orders over $50.00 will be shipped Flat-Rate Priority mail FREE (typically 2-day delivery). Orders typically ship inside of one week. For specific questions, feel free to connect with Pete via Facebook or e-mail.

Pete’s Bio

Pete’s love for fly-fishing started in the early 1980s. For some time, Rhode Island ponds, back bays, and beaches were his stomping grounds for trout and Striped Bass. In fact, he fly-fished Rhode Island coastal waters for over 20 years. His quest for new species on fly yielded Bonito and False Albacore for a few years running. Pete later moved to North Carolina and fished the Roanoke for Shad and Striped Bass. Travels to Alaska have included fishing Montana Creek all the way to Homer, landing abundant Sockeye and Silver Salmon, Halibut, and Ling Cod. Pete spent some time fishing New River in Virginia for enormous volumes of Small Mouth Bass. His passion for fly-fishing and years of experience is evident in his fly-tying creativity.

Fly-Fishing Knots: Rigging Your Rod & Reel


Many resources are available on the net these days, all advising which knots are best for rigging a fly-line and leader. A majority of these knots have a similar breaking strength, especially when you look at all the loose variables in tying them. For example, how many wraps were used, are the adjoining lines similar in size, is one line monofilament and the other fluorocarbon, etc. If a super strong knot is used for tying the wrong materials together, the knot won’t live up to it’s tested breaking strength.

Keep in mind, some knots are easier to tie in the elements (i.e. darkness, cold temperatures, high wind, etc.). One main goal in my post today is to give readers a sense of peace when it comes to choosing what knots work best when rigging fly-lines and leaders. Choose strong, easy-to-tie, and low profile knots in the beginning may be your best bet. If you are after monster fish, well, seek professional guides who specialize in landing trophy fish. Ask for “fish specific” advice on the best knot for your application.

[row][column size=’2/3′]

Reel Spool & Backing

Let’s start with securing your fly-line backing to the reel. Simply said, best way to secure backing to your spool is to use an Arbor knot. This is unanimous advice in almost every book and every resource on the net. Good practices include making several wraps around the spool before securing the knot. This will more evenly distribute the pressure if by chance you ever end up losing all your line to a fish.

Backing to Fly-Line

Knots will differ slightly based on how your fly-line is terminated. Quite a few of the new fly-lines today come from the manufacturer with a welded loop on each end. If you haven’t fly-fished in the last few years, this welded loop will be a new feature.

With Welded Loops – You will need to tie a loop for the adjoining end of your backing – this will be secured loop-to-loop with your fly-line. It is advised to tie the adjoining loop large enough to pass a fly-line spool clean through the loop, say maybe a loop eight inches (8″) in length. This larger loop makes it easier to swap out fly-lines when necessary. Loops most often tied in backing for this purpose are the Surgeon’s Loop, or the Bimini Twist. The Surgeon’s Loop is simple and for quick applications is tied most often. Use at least three (3) wraps to make secure and remember to tie an eight inch (8″) loop. The Bimini Twist is tied much more easily with two people, however can be tied by one person with a little practice. This is the strongest loop – it’s breaking strength is rated the highest of all loop knots.

Without Welded Loops – Traditionally, the Nail knot was used for tying backing to fly-lines. It is a low profile knot and is typically used for greater strength with dissimilar line diameters. For some time now, a more popular knot used for securing backing to fly-line is the Albright knot. It also is used for securing to lines of dissimilar diameters. More fly-fishing experts seem to use the Albright knot more than any other.

Fly-Line to Leader

Here as well, knots will differ slightly based on how your fly-line is terminated. Below are solutions for lines with welded loops and some for lines without welded loops. Some experts say to get fly-lines to transfer energy from fly-line to leader more efficiently, using heavier monofilament is better for the base portion of your leader. Evidently, monofilament is advised for its flexibility and larger gauge. There are positive arguments for using fluorocarbon, however they don’t seem as convincing.

With Welded Loops – You will need to tie a loop for the base of your leader – this will be secured loop-to-loop with your fly-line. The loop is used for easily swapping out leaders when necessary. Loops most often tied in leaders are the Surgeon’s Loop, or the Perfection Loop. RIO (a major supplier of high quality fly lines and leaders) supplies their tapered leaders with hand tied Perfection Loops. This might suggest a Perfection Loop is a solid way to go. I also prefer the Perfection Loop – it is extremely fast and easy to tie.

Without Welded Loops – Traditionally, the Nail knot is renown for tying the base portion of the leader to fly-lines. It is a low profile knot and is typically used for greater strength with dissimilar line diameters. As an old-school guy, I’ve always liked the look of a good Nail knot and feel like it moves through the guides a little easier, especially if you lube it with a little Chapstick. Typically this base portion of the leader is 40 or 50 pound monofilament (for saltwater applications) and should be at least two (2) feet long. The end of this base portion of leader can be terminated with a Surgeon’s Loop or Perfection Loop – it will allow for quickly swapping out leaders when fishing conditions so demand. If you are going to use a Surgeon’s Loop, make at least two (2) full wraps when using larger gauge monofilament.

Leader to Leader (tippet)

As you move past the base or butt section of monofilament leader, it would be advised to use fluorocarbon for the remaining leader and tippet. Fluorocarbon is not only thinner than monofilament, but is harder and somewhat stiffer. When stepping down portions of leader to meet your tippet, there are two knots that seem most popular, specifically the Surgeon’s knot and the Blood knot. Many find the Surgeon’s knot easy to tie. A small drawback to this knot is how square it can be. If you have smaller diameter line, use at least four (4) wraps. If you have larger diameter line, use at least two (2) full wraps. The Blood knot is my knot of choice. It not only has a reasonable profile (slips through guides nicely), but is very strong. Believe it or not, you can tie Blood knots very quickly.

Tippet to Fly

Many knots exist for securing flies to tippets. In freshwater fly-fishing, or when you need a fly to specifically behave as one with the line, an Improved Clinch knot is still used most often. In saltwater however, flies are fished below the surface and should move independent from the line. In this case, an open loop secures the fly to the line or tippet. This allows for more natural movement of the baitfish, shrimp, crab, etc. An endless amount of loop knots exist, however three of the most popular include the Non-Slip Mono, Perfection Loop, and Surgeon’s Loop. I use the perfection Loop as it is very quick to tie and is rated one of the highest for breaking strength. Remember to tie your loop relatively small. A good rule of thumb is to make your loop less than one quarter the length of your fly.

One last tip: If you are one to tie your own leaders like most other fly fishing experts, always carry some tapered leaders for contingency. If for some reason you have run out of leader or tippet material, having a quick and easy tapered leader ready to go is huge, especially if you are a good distance away from the boat, marina, or your lodge.

Questions or comments? Please feel free to comment/ reply to this post below – We will be glad to offer any additional advice.
[/column]

[column size=’1/3′]

Arbor Knot
Arbor Knot

Welded Loop
Welded Loop

Surgeon's Loop Knot with Backing
Surgeon’s Loop Knot

Bimini Twist
Bimini Twist

Albright Knot with Backing
Albright Knot

Surgeon's Loop Knot with Monofilament
Surgeon’s Loop Knot

Perfection Loop Knot with Monofilament
Perfection Loop Knot

Nail Knot
Nail Knot

Surgeon's Knot with Monofilament
Surgeon’s Knot

Blood Knot
Blood Knot

Improved Clinch Knot

Non-Slip Mono Loop Knot with Monofilament
Non-Slip Mono Loop Knot
[/column][/row]

Orvis Fly Tying Guide, Tom Rosenbauer


If you are looking for a comprehensive book on tying flies, you found it! The Orvis Fly-Tying Guide includes detailed steps from start to finish on how to tie flies for all the basic patterns. Fresh and saltwater flies are covered, beginning and advanced techniques are covered, and detailed photography of each step of the fly tying process is included. The book lays the basic ground work by explaining simple tying techniques and then progressing with detailed tying instructions for some of the most popular and modern patterns. How to choose and prepare the correct material and all necessary tying steps for each fly are detailed in beautiful large color photographs.

[row][column size=’2/3′]
Once you have practiced basic tying techniques, the book includes photographs of endless fly patterns to inspire your future designs. All 400+ patterns include their fly tying recipes and proportions to help recreate them. Endless colors and fly patterns will get you thinking out-of-the-box on what materials to include in your next fly. This of course will get you “jonesing” to hit your closest fly tying shop to pick up the next batch of materials for your fly tying bench. Believe me, I know how it works…

For those interested in how much of the book is dedicated to saltwater – about one third addresses saltwater fly tying and fly patterns. Again, techniques and instructions may be demonstrated on freshwater flies, however most is applicable to saltwater flies.

Enjoy![/column]

[column size=’1/3′]

Orvis Fly-Tying Guide
[/column][/row]

1001 Fly Fishing Tips


1001 Fly-Fishing Tips is a one-of-a-kind collection of practical advice from over twenty-five of the world’s most renown fly-fishing experts. This book includes 1,001 of the best fly-fishing tips compiled by the former managing editor of Fly Fisherman magazine. It covers essentials from trout to tarpon, such as: casting with Lefty Kreh, matching the hatch with Charlie Meck, taking great fish photos with Barry and Cathy Beck, mastering mayflies with John Barr, catching selective trout with Mike Lawson, West Coast Stripers with Dan Blanton, Steelhead secrets with Lani Waller, and Spey casting with Simon Gawesworth.

[row][column size=’2/3′]
For those of you asking what percentage of the book is dedicated to saltwater fly-fishing; I’d say about one third. Keep in mind, advice on tying knots, releasing fish, taking fish photos, etc. are all applicable to fresh and saltwater. With a quick and easy-to-read format, 160 illustrations from renowned artist Dave Hall, and encyclopedic coverage of almost everything that’s important to know about fresh and saltwater fly fishing, this book is will offer some great advice for all fly-fishing enthusiasts.

As we are approaching the holiday season, this would make an excellent stocking-stuffer. The paperback version comes in a small format and a Kindle version is available as well.

Enjoy!
[/column]

[column size=’1/3′]

1001 Fly-Fishing Tips
[/column][/row]

Simms’ Stone Cold LS Shirts


A few weeks ago, I picked up one of these Stone Cold LS Shirts from Simms . The store owner suggested I try it on and get a feel for how cool the shirts feels. To my surprise, the material really felt cool. I’m not really sure whether it’s the weave or material thickness which makes it so cool.

I ended up purchasing the shirt a half size larger than I would typically, only to leave room for an under-layer if needed. I do like to have shirts fit loosely, especially in warmer weather when an under-layer is not needed.

Over the last ten years or so, there has been a popular trend of fishing shirts getting “over pocketed”. I would find two main chest pockets having four pockets stacked on top of each other! Of course, these pockets would consist of boxed pockets, mesh pockets, velcro pockets, zipped pockets, and “half” pockets. You could never really figure out how to get in to any of them. The beautiful part of the Simms Stone Cold LS Shirt is the fact it only has two chest pockets, tucked under a aesthetic/ weather hem. The pockets include zipper enclosures and lanyards.

If you are in the market for a warm weather sun/ fishing shirt, try one of these Stone Cold shirts on and feel the difference.

[row][column size=’1/2′]

Description

Teeming with Cool Control™ fabric tech, Simms’ Stone Cold LS Shirt delivers Arctic-inspired relief during simmering days on the water. Recycled jade crushed into a fine powder and implanted into the yarn powers this cool-to-the-touch fabric. The result is a sustainable, stylish, temperature-regulating piece, with the added benefits of anti-odor, wicking, and quick-dry performance. Additional features include fly box compatible, zippered chest pockets, extended Sun Cuffs for prime sun protection, and the added comfort of a straight hem and smooth off-shoulder seams.[/column]

[column size=’1/2′]

Simms' Stone Cold LS Shirts
[/column][/row]

Features

[list]
[list_item]Cool Control™ fabric technology absorbs & dissipates heat & provides a cooler, more comfortable garment[/list_item]
[list_item]Two fly box compatible, zippered chest pockets[/list_item]
[list_item]Under collar buttons, straight hem & off-shoulder seams for added comfort[/list_item]
[list_item]Extended Sun Cuff for additional protection[/list_item]
[list_item]Winner Gray’s Sporting Journal’s Best 2013[/list_item]
[/list]

[list]
[list_item]FABRIC TECH:   50% Nylon/ 50% Polyester with Cool Control™ fabric technology[/list_item]
[list_item]APPROX. WEIGHT:   6.5 oz[/list_item]
[list_item]STYLE FIT:   Traditional Fit[/list_item]
[list_item]SIZES:   S – 2XL[/list_item]
[list_item]COLLECTION:   Guide Series[/list_item]
[/list]

Fly-Fishing for Bonefish, Chico Fernandez


Fly-Fishing for Bonefish covers the biology of Bonefish, what they eat, and how tide influences fishing. A section of the book dedicated to fly-fishing gear describes specific flies, lines, rods, reels, and more. Special attention is given to configuring the optimal leaders and how to rig your tackle to deliver more fish. Chico Fernandez explains how to hunt for Bonefish, casting techniques, retrieving fish, hooking up, fighting, landing, and how to release Bonefish safely. Included are tips on traveling to the flats and insight on how to better protect our saltwater resources.

[row][column size=’2/3′]
If you are new to saltwater fly-fishing or would like to learn more about Bonefish or flats fishing in general, this book is perfect for you! I found myself gripped, anticipating each section, one after another. How tides play such a big role in their feeding pattern, where they hide, and when they choose to eat. Chico talks about what specifically to take on trips, what clothes/ material to wear for weather and fast drying functionality. This book is filled with tips and tricks to stay comfortable through the day and ultimately land more fish.

Keep in mind, this resource is not applicable to Bonefish alone. Great secrets for fishing the flats are included. This means a good portion of the book will apply to Permit, Tarpon, and other species roaming the flats.

Enjoy the book – I know you will as well….[/column]

[column size=’1/3′]

Fly-Fishing for Bonefish by Chico Fernandez
[/column][/row]

Fly Tying Materials: Where Do You Start?


It is a bit overwhelming, standing in the fly shop and looking at the walls covered in fly tying materials with endless colors. Where do you start? As someone who just recently experienced this, I want to share my solutions and offer a way to make sense of it all.

Before jumping into what materials to purchase, it is important to focus on a fishery and/ or targeted fish. In this case, we are going to focus on salt water flies used for Bonefish, Permit, Tarpon, Snook, and Redfish – all in South Florida.

Let’s talk materials…basic materials. If you only purchased a few materials/ colors, the following suggestions will give you a running head start.

HOOKS: In the beginning, start with a standard length and standard strength fly tying hook. Anything equivalent to Mustad 34007 will be fine. Don’t worry about the finish or coating of the hook at this time. Later, if you wish to only fish with stainless or tin coated hooks, many are available to choose from. For our targeted fish above, sizes 2, 4, 6, and 8 will be of interest. For those just starting to tie salt water flies, start tying with larger hooks first. In this case, use some #2 hooks initially.

THREAD: Many types of thread are available and are made from several different materials. To get started, larger gauge thread will be easier to use, but not necessarily produce intricate flies/ designs. Picking a gauge in the middle will work well for several reasons. I suggest using anything equivalent to UTC 210. For our targeted fish, your first five colors of thread should include white, tan, fluorescent chartreuse, fluorescent shell pink, and fluorescent red. If you reached for a second set of colors, grab burnt orange, rusty brown, black, fluorescent pink, and fluorescent fire orange. Having this color set gives you endless combinations of fly designs applicable for patterns used on the above fish. If you wish to take things one step further in creativity, pick up some UTC fluorescent pink vinyl-rib (medium), UTC silver/ gold holographic tinsel (medium), and UTC clear mono-filament (.006).

EYES (weight): Having the ability to add different amounts of weight to flies gives your flies the ability to sink at different rates. Light weight flies are used in shallow water (skinny water) and heavier flies in deeper water. To initially build your stack of materials, pick up some silver and gold Bead-Chain eyes (large) and some nickel and gold Brass Eyes (medium). Initially, this will offer some options for your larger sized hooks. Eventually, if you begin tying smaller flies, step down a size in both Bead-Chain and Brass Eyes. The smaller size will work nicely for the smaller sized hooks.

BODY MATERIAL (sparkle braid): Flat Diamond Braid or sparkle braid is a great option for quickly wrapping the shank of a hook to build up a reflective body, similar to those found on many Gotcha flies. A good suggestion would be to pick up sparkle braid in cream, pearl, and peach/ pearl.

BODY MATERIAL (dubbing): Dubbing a fly really gives a fly some girth and fuzz, taking authenticity up a notch. See some pics in our posts titled Flaming Shrimp, Sandy Shrimp, and Dubbed Shrimp for examples of what dubbing can do for a fly. Some initial dubbing colors we suggest you purchase would include shrimp pink, pale pink, flame, and tan. Maybe find some dubbing which incorporates UV flash. It will offer that subtle flash of blue and purple.

WING MATERIAL (buck/calftail): If there was a staple material in fly tying, it would have to be bucktail or calftail. Keeping this simple, best thing to do is pick up a sample pack of multiple colors. The idea is to stay with bright colors initially – I suggest fluorescent bucktail. If you wish to pick up a second set of colors, get another sample pack with standard colored bucktail including white, cream, taupe, brown, olive, and black.

WING/ TAIL/ ANTENNAE MATERIAL (crystal flash): In fly tying, crystal flash may be considered the most magic ingredient or material of all. Back in the day when materials were all natural, it was so difficult to get that “fish scale” flash in flies. crystal flash brings multicolored fish scale flash to your flies. This material is a must-have for any salt water fly tying bench. Initially, I would suggest purchasing colors including olive/ pearl, fluorescent shrimp pink, UV pearl, rainbow/ pearl, and black pearl. If you reached for a second set of colors, grab silver, gold, copper, black/ red, and “mirror”.

BODY/ TAIL MATERIAL (Marabou): Marabou will be important for fluffy tails among other things. Suggested colors to purchase would include white, fluorescent orange, and anything resembling taupe. Here’s a look at “banded” Marabou – great for shrimp flies!

WING/ BODY MATERIAL (EP fibers): This synthetic EP fiber is the best material for making so many salt water flies. EP fiber can be used for wing, body, and tail material. Depending on how you tie EP fiber, a fly can take on unimaginable shapes. It doesn’t take too much of the EP fiber to complete a fly either. Your fist five colors should include white, pale olive minnow, pink, chartreuse, and orange. This will get you tying shrimp, crabs, deceivers, clousers, and many other salt water patterns out of the gate.

SILICONE LEGS: In an effort to keep things simple, having standard sized rubber legs in orange, pink, root beer, or clear offer you a great selection for beginning to incorporate legs into flies. Great thing about clear legs, you are able to color them with permanent markers to give you the color pattern of choice. Make sure the rubber legs you purchase have black specs (peppered) or some barring, as this offers a more realistic set of crab or shrimp legs.

WEED GUARD MATERIAL: Flies used in areas with turtle grass or other forms of sea grass will need a weed guard. Tying in a weed guard is simple. Purchase some 30 pound monofilament (clear). You shouldn’t need more than a 20 yard spool for now.

PERMANENT MARKERS: Don’t underestimate what a Sharpie can do to a fly. Sharpies in multiple colors give unlimited options for custom coloring rubber legs, body material, and touching up body thread exposed in awkward areas. Sharpie offers a mini variety pack which has worked very well for me. I use a few of their fluorescent colors too.

A few things to remember:

1) Take advantage of digital media for examples and tying tips (i.e. videos, step-by-step photos, specs/ recipes, etc.)
2) Less is more. Tie flies with less material than expected.
3) Keep it simple, especially in the beginning. Flies are created in layers, one layer at a time.

The information above should offer some insight prior to purchasing your initial set of fly tying materials. Questions or comments? Please feel free to reply to this post below – We will be glad to offer additional advice or information specific to your needs.

See related post titled Fly Tying Tools: Where Do You Start? for suggested tools to get you started tying flies today.