Capt JD

About Capt JD

In 1978 I was first introduced to stream fishing while backpacking in California's southern Sierra mountains. Can't say how inspiring it was to watch Rainbows making their way upstream, pool to pool, navigating book-like waterfalls etc. Crystal clear and cold water it was. I spent quite few years discovering the fisheries before being introduced to a fly-fishing rig. In 1982, I was introduced to an antique cane rod and click-pawl reel. The engineering of this reel and simple concept of throwing a weighted line to get a super-light artificial fly out into the middle of a stream made its lasting impression. I suppose it's my intrigue for activities and sports combining outdoor elements, strategy and a fair amount of physics that seemed to grip me. After quite a few years snow skiing, golfing, skeet shooting, yacht racing, and of course fly-fishing, I can now see how much physics plays a part in all of them. In my early years of fly-fishing, I discovered I could tie my own flies. If a fly needed more of one color than another, I could simply tie one to work more effectively. The endless number of materials and colors opened the door for design and creativity. The structuring and layering of materials added many more options. The combinations of size, texture, style, and functionality were endless. Needless to say, I was hooked. My experience with fly-fishing continued with discovering fisheries up and down the west coast, from California to Arctic Circle. In the early 1990s, I spent some time floating the Green and Teton rivers for Rainbows. In the mid 1990s, I was fortunate enough to fish Alaska, BC and NWT for Cutthroat, Rainbow and Lake Trout – the occasional Grayling was nice too. Moving to Hawaii in 2012 offered me a look at some sizable Bonefish and another amazing fishery. In 2014, I relocated to southern Florida and was knocked over by such an expansive fishery. Florida is truly the capital of sport fishing. Miles and miles of untapped fisheries are waiting for the next fly-fishing enthusiast...well, that and some really big fish. I hold a USCG Master Inland and Mate Near Coastal 50 Ton Captain's License with Assistance Towing and Auxiliary Sailing Endorsements. I also hold a NAUI Openwater 1 certification in SCUBA. Professionally, I have over 30 years in leading technical teams in project, program, and change management within IS, IT, Application Development, and high-tech construction. A majority of this experience was acquired within the aerospace, undersea, telecom, networking, engineering, and healthcare fields. I hold a Bachelor of Science degree in Engineering, Master of Science degree in Organizational Leadership, and professional certifications in project, service, and quality management. My fly-fishing journey has been amazing thus far - its discoveries are never ending and all inspiring to say the least. Let's keep it this way for all to come. Please take care of the fish you catch/ release and let's continue to work diligently minimizing our back-country footprint. - Capt JD.

Rock Shrimp: Olive Pearl


Recreate fly patterns at home! Materials used in making this fly have been included below. Always keep in mind your local fly-fishing store will most likely have the materials referenced, and typically for less. Materials can also be found at Amazon or any other major on-line resource.

Fly-Tying Materials

[list]
[list_item]Mustad Hook 34007SS (#4)[/list_item]
[list_item]UTC Thread 210, Tan[/list_item]
[list_item]Bead Chain Eyes, Large, Black[/list_item]
[list_item]Krystal Flash, Olive[/list_item]
[list_item]Krystal Flash, Black/ Pearl[/list_item]
[list_item]Rooster Cape, Grizzly Variant (for body and claws)[/list_item]
[list_item]Berkley Vanish, Fluorocarbon, 30#, Clear (weed guard)[/list_item]
[list_item]Sally Hansen Hard As Nails, Hardener, Clear (#2103)[/list_item]
[/list]

Design Inspiration & Detail

This fly pattern is very simple to make. Technically one long rooster quill (in Grizzly, Cree, or Barred Dark Ginger) could make several flies. Add your desired color of Crystal Flash and your done! I tied in a few colors of flash above to show how different they can look. I added the Black/ Pearl Krystal Flash for antennae to further excite the fish. Add rubber legs if you like – the options are endless.

Target Species

This particular fly was designed to attract Bonefish and Permit – many other species will also take the fly on a retrieve.

Columbia’s Backcast Nylon Pant: 5-Star Performer


In South Florida, it can get pretty warm (90°F with 90% humidity) in the Summer months. One of the best ways to steer clear of the sun and stay cool is to wear a lightweight pair of UPF nylon pants. Many manufacturers (i.e. Patagonia, Simms, ExOfficio, etc.) offer UPF pants in polyester and nylon, however Columbia’s PFG Backcast Pant initially felt most comfortable and cool. One of the most appealing features of the pant is its super lightweight nylon. The pant also comes with a UPF rating of 50.

The Backcast nylon pant has an elastic waist band and poly draw-string for closure. I can’t say the small gauge draw-string could do much when the pants get wet, however I’m not going to wait and see. Great part of their design however is the fact they also come with belt loops. I always use a nylon Patagonia belt when out in the water. The belt not only works to keep wet pants up and secure, but also holds various fly-fishing tools (i.e. retractors, nippers, rag, etc.). This particular belt works nicely with the Backcast pant. In the beginning I had some discomfort, as the belt was pressing the draw-string into my hip bone. After I figured out the issue, I removed the draw-string indefinitely. If you want to try wearing the pants with a belt (without the drawstring), but think you may use the drawstring at a later time, here’s a tip: When pulling out the poly draw-string, tie a very thin nylon thread (sail thread) to it and pull it through. Secure the nylon thread to itself, so it won’t pull out when the pants are being used. This thread can be used to pull back in any other draw-string you wish to use at a later date.

Pockets are great as well! Both side pockets have wide openings. Columbia offers only one back pocket (right side) – this pocket has a zipper as seen in the image above. An additional vertical utility pocket is located adjacent to the right-hand pocket along the outside seam.

An inside poly mesh lining comes with this pant. The mesh is a huge contributor to drying out and keeping cool. When it comes to increased air flow or allowing sand to fall away, the mesh really adds to the pant’s functionality.

Surf Fishing

Light weight nylon pants work very well when in the surf. When fly-fishing in the surf, waves hitting your legs will often throw sand up into your shorts, making your walk home a little more uncomfortable. Great thing about wearing pants out in the surf is the fact you’re more protected.

Yak fishing

Columbia’s PFG Backcast Pant is perfect for kayaking, especially when your legs end up 90 degrees to the sun’s rays. Best you have boots, booties, or high-tops however, as the pants will come up a bit (exposing your ankles to the sun) when sitting/ paddling.

Colors & Sizes

Columbia’s PFG Backcast Pant comes in three colors: Fossil, Cypress, and Grill. In addition, the pants come in sizes ranging from Small to XX-Large with in-seams of 30, 32, and 34. For more information from Columbia, visit their PFG Backcast Pant web page.

Finding a Pair

Most fishing stores and retailers offering outdoor gear will have Columbia. West Marine and Bass Pro Shops will offer a sizable selection of Columbia gear. This particular pant is priced at $30 at most retailers and can be found on Amazon sometimes for $24!

Columbia also makes the PFG Backcast Pant in a “convertible” option. Meaning, you have the option to zip off the lower half of each leg to offer you instant shorts. Amazon also offers this convertible pant for a reasonable price.

If you have a great UPF pant solution – by all means, share it with us! Fly Mastery readers are always interested in improving their gear and its functionality…

Rock Shrimp: Using Grizzly Hackle


Grizzly hackle is a necessity for every saltwater fly-tying bench – really for all fly-tying benches. Whether making claws, wings, shrimp legs, or simply wrapping the hook shank, Grizzly hackle and its natural barring can’t be beat. Barring gives so much action to flies. Other great colors are available as well, all offering amazing variegation in color.

A few tips when buying hackle:

   Suppliers will offer various grades of pelts (i.e. platinum, gold, silver, bronze, professional, etc.).

   Higher grade pelts offer more feathers, however no difference in feather quality.

   Most suppliers will offer various sizes of pelts, (i.e. full, half, quarter, etc.). Purchasing smaller pelts and more colors may be more cost effective when trying to increase options at the tying bench.

   If looking for small feathers, “hen capes” are best – for large/ long feathers, “rooster saddles” are best.

   For my saltwater fly-tying applications, I use Whiting Bugger Packs. The packs offer fairly long tapered feathers and some smaller as well. Each pack offers a fly-tyer a perfect sample of feathers for tying all types of saltwater flies. For natural colored saltwater flies, see the colors Grizzly, Grizzly Coachman, Furnace, and Barred Dark Ginger.

   For a full selection of hackle and colors, see the Whiting Farms web resource. It helps to see all the options. Whiting is also known for being one of the top three hackle producing farms – many argue they are the best.

In retrospect, looking back over my first year of saltwater fly-tying, I would have made one change in purchasing my materials. I would have invested in Bugger Packs or pro-grade (lowest grade) quarter saddles in more colors right out of the gate. Must-have colors for me include Grizzly, Cree, Coachman, and White. I find these colors to offer more options when tying saltwater fly patterns including shrimp, crab, streamers, and many more.

Recreate these flies at home! A list of materials used to make them are included below. Always keep in mind your local fly-fishing store will most likely have the materials referenced, and typically for less. Materials can also be found at Amazon or any other major on-line resource.

Fly-Tying Materials

[list]
[list_item]Mustad Hook 34007SS (#4)[/list_item]
[list_item]UTC Thread 210, Tan[/list_item]
[list_item]Bead Chain Eyes, Large, Black[/list_item]
[list_item]Krystal Flash, Olive/ Pearl, Royal Blue, Copper, and Gold[/list_item]
[list_item]Krystal Flash, Black/ Pearl[/list_item]
[list_item]Rooster Cape, Grizzly Variant (for body and claws)[/list_item]
[list_item]Berkley Vanish, Fluorocarbon, 30#, Clear (weed guard)[/list_item]
[list_item]Sally Hansen Hard As Nails, Hardener, Clear (#2103)[/list_item]
[/list]

Design Inspiration & Detail

This fly pattern is very simple to make. Technically one long rooster saddle quill (grizzly) could make several flies. Add a little Crystal Flash of your desired color and your done! I tied in a few colors of flash above to show how different they can look. I added the Black/ Pearl Krystal Flash for antennae to further excite the fish. Add rubber legs if you like – the options are endless.

Target Species

This particular fly was designed to attract Bonefish and Permit – many other species will also take the fly on a retrieve.

Tarpon Flies 101: Simply Using Feathers


Tying Tarpon flies can be a great way to start fly-tying. Not only are Tarpon flies tied on a slightly larger hook, they can be tied by simply using feathers. In other words, the only materials you need for tying these flies are hooks, thread, and feathers…well that and maybe some head cement.

Almost any color of feathers will do – brighter colors seem to work best in the daytime. The color pattern above works well at night, believe it or not. Rooster Saddle will work well for a tail and some Marabou for the body. I like to use UTC 210 Thread in black, simply because black works well with most colors and helps soften the eye of the hook. In the pattern above, I used Fluorescent Pink to contrast the black Marabou.

[row][column size=’2/3′]

Step 1

Start with 1/0 or 2/0 stainless steel hook. Some hook manufacturers offer specific hooks made for Tarpon. I simply use Mustad 34007SS Hooks. Start your thread and wrap the hook shank one full time and then come back about half way. This will give tail and body material something porous to grip onto when securing to the hook shank.

Step 2 – Optional

If you are looking for a little flash in your fly, tie in some Crystal Flash or Flashabou (4 to 6 stands) before securing tail feathers.

Step 3

Take a few pieces of Rooster Saddle, say maybe about 6 or so, and splay them out (3 to the right and 3 to the left). Secure these feathers to the hook shank as you would a any tail. Feathers should extend out about 2 inches or so. After secured, cut of any excess material and finish wrapping.

Step 4

Use a complementing color of Marabou to cover the attached Rooster Saddle (tail feathers), wrapping the full circumference of the hook shank. Secure with several wraps of thread, working up a head. Coat with head cement to secure thread-wraps.
[/column]

[column size=’1/3′]
Tarpon Flies 101: Step 1
Step 1
Tarpon Flies 101: Step 2
Step 2 – Optional
Tarpon Flies 101: Step 3
Step 3
Tarpon Flies 101: Step 4
Step 4

[/column][/row]

Fly-Tying Materials

Materials used in making this fly have been included below. Always keep in mind your local fly-fishing store will most likely have the materials referenced, and typically for less. Materials can also be found at Amazon or any other major on-line resource.

[list]
[list_item]Mustad Hook 34007SS (#1/0 or 2/0)[/list_item]
[list_item]UTC Thread 210[/list_item]
[list_item]Rooster Saddle, Long[/list_item]
[list_item]Marabou[/list_item]
[list_item]Sally Hansen Hard As Nails, Hardener, Clear (#2103)[/list_item]
[/list]

Design Inspiration & Detail

It was a Tarpon fly video by Matt Thomas that inspired me to write a post on tying simple Tarpon flies. His less-is-more approach to tying these effective flies is definitely worth sharing.

Target Species

This particular fly was designed to attract Tarpon – many other species are also attracted (i.e. shark, Barracuda, and other larger predatory fish).

Cuban Shrimp v2


Recreate fly patterns at home! Materials used in making this fly have been included below. Always keep in mind your local fly-fishing store will most likely have the materials referenced, and typically for less. Materials can also be found at Amazon or any other major on-line resource.

Fly-Tying Materials

[list]
[list_item]Partridge John Holden Sea Hook (#4) or Orvis O’Shaughnessy Hook (#6)[/list_item]
[list_item]UTC Thread 210, Black or Tan[/list_item]
[list_item]Bead Chain Eyes, Large, Silver[/list_item]
[list_item]Chenille, Medium, Brown & Tan (Brown & Light Olive also pictured)[/list_item]
[list_item]SLF Prism Dubbing, Orange & Pink[/list_item]
[list_item]Pheasant Tail[/list_item]
[list_item]Centipede Rubber Legs, Small or Mini, Grey[/list_item]
[list_item]Crystal or Midge Flash, Pearl[/list_item]
[list_item]Golden Pheasant Tippet[/list_item]
[list_item]Woodchuck or Coyote[/list_item]
[list_item]Bristles from a hair-brush (tipped w Black Sharpie)[/list_item]
[list_item]Sally Hansen Hard As Nails, Hardener, Clear (#2103)[/list_item]
[/list]

Design Detail

This fly was designed and tied by Dron Lee of Kuala Lumpur, Malaysia, in 2013. This is one of many original designs by Dron. To learn how to tie the Cuban Shrimp v2 step-by-step, see Dron’s Cuban Shrimp v2 blog posting.

Target Species

This particular fly was designed to attract Bonefish and Permit – Red Bass, Triggerfish, and many other warm water species will also take the fly.

Saltwater Fly-fishing Gear: Editor’s Choice


When it comes to purchasing fly-fishing gear (i.e. rods, reels, line, etc.), there are so many models and brands to choose from. Technology advances exponentially each year, bringing better and better equipment to the table. It is true my G3 Sage rod from 1990 still holds its own, however it seems like new rods have this extra sense of something – making them super sensitive, but yet more powerful. Reels have also evolved by leaps and bounds. Reels have become thinner in width and larger in circumference, giving better leverage on the retrieve. Designers have realized there is an excess of aluminum in reels and have since removed all but a skeleton structure to hold/ retrieve line. A byproduct of this creates great air flow around the spool, allowing the line to dry more quickly. Drag systems are now fully sealed, keeping sensitive drag components free of corrosion and grime. Exciting stuff really…

I get asked quite often what my “go-to rig” includes. As I answer most questions with a post, I figured I would add a little more than simply what gear I choose to fish. I have a Sage/ Galvan 3-weight for packing high altitude, a Sage/ Hardy 6-weight for all freshwater, and a Sage/ Galvan 9-weight for all Saltwater applications. As this post is focused on saltwater, I’ll continue with my 9-weight rig.

Before designing or choosing a rig, it’s important to focus on a target fishery or an environment and set of species to fish. One fly-fishing rig won’t do it all, but it’s possible to get one rig to cover a lot of ground. In my case, I wanted my first rig to handle Bonefish, Permit, Snook, Redfish, small Tarpon, Barracuda, and the occasional Jacks, Dolphin (Mahi), Shark, etc. As the 8-weight rods are built more for the Bonefish, Jacks, Sea Trout, small Snook, and small Reds, I stepped up in rod weight. As 10-weight rods are built more for Permit, Tarpon, Barracuda, and the like, I figured I would step down a bit. I felt like a 9-weight would handle a little of everything. Reels quite often are designed for multiple line-weights. I ultimately chose a reel that would work for 9 and 10-weight rods/ lines.

Rods

In 1990, I stopped using free/ borrowed stuff and purchased my first rod/ reel. I purchased a Sage 590-2 LL G3, a 5-weight Light Line Graphite rod perfect for Western river fishing. I broke a tip here are there and Sage always sent me a new one for $20. Needless to say, Sage not only has a nice product, but also a solid life-time warranty service. From the 1990s forward, G Loomis has always been a major player in manufacturing solid fly-rods. G Loomis (Gary) now lends any new technology improvements and innovation to Temple Fork Outfitters (TFO). TFO has the best bang-for-the-buck rod hands down. Their BVK rods always sits at the top of the lists in expert reviews.

I currently fish with a Sage One, 990-4. It’s relatively light weight, feels like it has a lighter swing-weight, and still seems to offer me the distance and control I want in a rod. Two other rods which interest me at this time are the TFO BVK 9-weight 4-piece and the G Loomis NRX 1089-4 G. Some friends and numerous experts in the field say great things about both rods. I haven’t been able to get out and use either of them, however they most likely would be a second and third choice at this time.

Reels

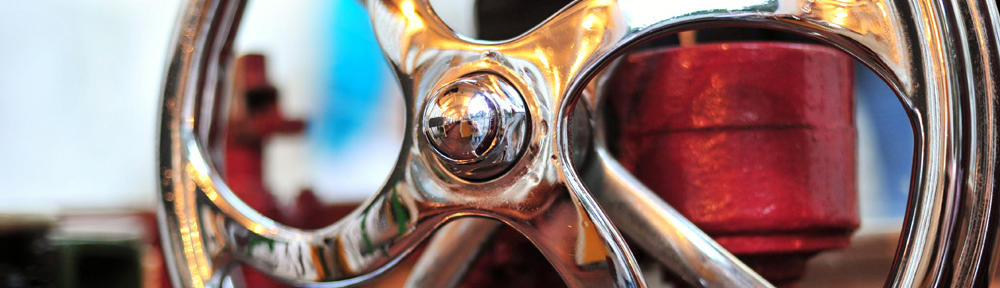
As mentioned earlier, in 1990, I stopped using free/ borrowed stuff and purchased my first rod/ reel. I purchased a Sage 505L (manufactured by Hardy), a 5-weight reel specifically designed for light line applications. I loved this click-pawl reel in so many ways. The reel worked flawlessly and was tough as nails. As Hardy manufactured the reel for Sage, I credit Hardy with the grade of materials and craftsmanship. I still appreciate Hardy reels and keep a close eye on the Ultralite SDS line. In 1999, I purchased a Galvan OB-1, a 3-weight reel I paired with a 3-weight 7′-0″ packing rod. I was so impressed with how the reel worked for me, I chose to stay with Galvan when purchasing my saltwater set-up. I did look at Lampson, Redington, Sage, Ross, Nautilus, Tibor, Einarsson, Hatch, Taylor, and others, however loved the minimalist design, air flow, functionality, and price point of the Galvan Torque series. I find it interesting how other reel manufacturers are now coming up with similar minimalist designs. More manufacturers are realizing you can keep a reel structurally sound and have it perform well with mush less material. Wright/ McGill and Taylor are now using much less material in their reels. Einarsson (manufactured in Iceland) looks like they are building a great product with much less material as well.

I currently fish with a Galvan T-10 and really like how it performs. Second and third choice reels for me would be the Einarsson Invictus 10 and Taylor Revolution 10, respectively. Both Galvan and Taylor reels offer a bang-for-the-buck value – Einarsson may be considered pricey by most.

Lines

Before purchasing my first saltwater fly-line, I wasn’t able to shoot as much of the heavy line as I wanted. I wanted more hands-on time – time to feel more of the line characteristics and differences before having to commit to purchasing one line. After debating lines made by Airflow, Rio, Scientific Anglers, Royal Wulff, Cortland, and others, I settled on Rio’s Bonefish Quickshooter. Considering advice from numerous expert sources, one common denominator emerged – to use a weight-forward (WF) line with no more than a 35′ tapered head. This puts more of the mass out in the air and gives someone new an easier start with heavier lines. Quite a few lines offer 40′ and 45′ heads, however only one or two manufacturers offered the shorter more compact head. Rio offered two colors in this line, Aqua-Blue/ Sand and a Orange/ Sand. When beginning to fish saltwater, it is nice to have a high-vis line – makes it very easy to identify in air and in the water. Keep in mind, if it’s easier for you to identify your line, it’s easier for fish to identify it as well. Now after some time out on the water and knowing how heavier lines behave in this environment, I think I could appreciate a stealthier line. In retrospect, the Aqua-Blue/ Sand color option looks more appealing now. Keep in mind some manufactures make completely clear fly-lines while others make simply clear heads. For the experienced, a clear fly-line would be the ticket.

I currently fish with Rio’s Bonefish Quickshooter WF9F in Orange/ Sand. As mentioned earlier, the bright head is nice, however I find myself using longer leaders to sneak up on fish in skinny water.

Leader/ Tippet

There are several schools of thought when strategizing on how to build leaders. Some swear monofilament should be used to build the majority of leader, leaving fluorocarbon for the tippet only. Some say it’s more important to pay close attention to the “size” of your leader material, stepping it down in sections to allow for better transfer of line energy. Well, after some trial and error, I tend to agree with the later. Some argue the mono is more forgiving (better movement) vs. the fluoro being too stiff. I think the aerodynamics and mass of the line play a more important role.

Whether you believe in a mono or fluoro leader, the goal is the same when stepping down in size to the tippet. I begin with the diameter size at the end of my fly-line and slowly step it down (in diameter and strength) from there. I start with a 2′ butt-section 50#, a few feet of 40#, a few feet of 30#, and a fluoro tippet of 20# (or 16#, or 12#), depending on you’re requirement or target fish. If two connecting sections of leader differ in diameter too greatly, you may get “line-stacking” when casting. In other words, your fly-line and some of your leader may cast nicely, leaving your tippet to stack up in a coil on the water. Graduating your leader sections based on diameter should be heavily considered.

I carry three bracelet-coils of Berkley, Vanish, Fluorocarbon, Clear (50#, 40#, 30#) for leader material and two smaller spools of 20# and 15# for tippet material. The tippet material is always carried in my waist-pack when on or off the boat. Oh yes, one other consideration – always carry at least three (3) ready-to-go tapered fluorocarbon leaders in your waist pack. It is inevitable you will be a mile from the boat (or car) when the coral rips your leader in two. Carry these as a contingency. I carry three Rio Saltwater Fluoroflex Tapered Leaders in my waist pack.

Summary

[list]
[list_item]Rod: Sage One 990-4[/list_item]
[list_item]Reel: Galvan T-10[/list_item]
[list_item]Fly-Line: Rio Bonefish Quickshooter WF9F[/list_item]
[list_item]Backing: PowerPro, Braided, White, 30#[/list_item]
[list_item]Leader: Berkley, Vanish, Fluorocarbon (50#, 40#, 30#)[/list_item]
[list_item]Tippet: Berkley, Vanish, Fluorocarbon (20#, 15#)[/list_item]
[/list]

Tell us about your saltwater “go-to” rig in the comment section below. Fly Mastery readers appreciate the outside perspective, especially when investing in similar gear…

Florida Fly-Fishing Trade Shows for 2015


Florida is fortunate enough to host two major fly-fishing trade shows each year. This year the ICAST IFTD Show will be held in Orlando and the IFFF Expo in Fort Lauderdale. Both shows are loaded with all the best fly-fishing gear exhibits, casting pools, demonstrations, fly-tying, technical classes, and more. Fly-fishing celebrities will also be attending – see show schedules for details!

[row]
[column size=’1/3′]
American Fly Fishing Trade Association
[/column]

[column size=’2/3′]

ICAST IFTD Show – Orlando, FL

JUL 14 – 17, 2015

This year’s ICAST International Fly Tackle Dealer Show (IFTD) will be held at the Orange Country Convention Center in Orlando, FL. Conference and events begin JUL 14, exhibition begins JUL 15. Major players in the fly-fishing industry will be attending, all sharing the latest and greatest products and services. As always, fly-casting and fly-tying demonstrations and instruction are always a great part of the ICAST IFTD Show. In addition, new and local manufacturers will be exhibiting their latest innovations. Be sure to pick up a 2015 IFTD Show Schedule and not miss out! Included are additional resource links for Attendees, Exhibitors, and a map to the convention center.

NOTE: This show is open to professionals only (i.e. buyers, manufacturers, suppliers, members of the media, exhibitors, etc.). Make sure you have the appropriate documentation (proof of profession) for access before approaching the Registration counter.

Feel free to e-mail AFFTA for any further questions…
[/column]
[/row]

[row]
[column size=’1/3′]
International Federation of Fly Fishers
[/column]

[column size=’2/3′]

IFFF Expo – Fort Lauderdale, FL

OCT 23 & 24, 2015

This year, the Florida Council of the International Federation of Fly Fishers (IFFF) will hold it’s annual fly-fishing Expo at the International Game Fish Association (IGFA) Museum in Fort Lauderdale, FL. Exhibition and events are scheduled for FRI, OCT 23 and SAT, OCT 24. Many influential fly-fishing contributors will be in attendance, offering workshops and advice for all. Tom Logan and David Olson (Expo Chairmen) are designing a great program for this year’s Expo – Chico Fernandez, Flip Pallot, Jon Cave, Pat Ford, Sam Root, and David Lambroughton are among a few who will be contributing. As always, fly-casting and fly-tying demonstrations and instruction are always a great part of the IFFF Show. Admission is $25 and kids under 16 are FREE. On-line registration will open AUG 25 and close OCT 18. To attend the banquet you MUST register on-line. For up to date info on programs, workshops, fly-tying, casting instruction/ certification, vendor coordination, auction/ raffles, press/ advertising, social media, and general registration, see the on-line IFFF Expo resource. Here’s a map to the IGFA Museum.
[/column]
[/row]

Bahamian Shrimp: Brilliant for Bonefish


Recreate fly patterns at home! Materials used in making this fly have been included below. Always keep in mind your local fly-fishing store will most likely have the materials referenced, and typically for less. Materials can also be found at Amazon or any other major on-line resource.

Fly-Tying Materials

[list]
[list_item]Mustad Hook 34007SS (#4)[/list_item]
[list_item]UTC Thread 210, White[/list_item]
[list_item]Bead Chain Eyes, Large, Black[/list_item]
[list_item]Krystal Flash, Red/ Pearl[/list_item]
[list_item]Krystal Flash, UV Purple[/list_item]
[list_item]Krystal Flash, Black/ Pearl[/list_item]
[list_item]Crystal Flash, Mirror (manufactured by Rumpf)[/list_item]
[list_item]Senyo’s Laser Dub, Tan[/list_item]
[list_item]Bucktail, Pink[/list_item]
[list_item]Sally Hansen Hard As Nails, Hardener, Clear (#2103)[/list_item]
[list_item]Sally Hansen Hard As Nails, Xtreme Wear, Disco Ball (#180)[/list_item]
[/list]

Design Inspiration & Detail

I wanted to create a shrimp fly with very neutral tones (pastels of light pinks, tans, etc.) and contrast them with dark colored antennae. Figured this would work very well in Caribbean waters where pinks, tans, and browns do the trick. While tying the fly, I kept twists to a minimum for dubbing and added wing material sparsely. For a little zing/ flash, I used Sally Hansen Hard As Nails (Disco Ball) – the metal flake in this stuff is wild.

Target Species

This particular fly was designed to attract Bonefish and Permit – many other species will also take the fly on a retrieve.

Crazy Charlies: Tying Effective Flies Quickly


A fish takes only a split second to decide whether to hit your fly or not. In other words, if it doesn’t take advantage of the immediate feeding opportunity, the next fish will. This means if your fly looks like the food they typically eat, acts like the typical food they eat, and appears at the right time of the day (considering tides), it’s fair game. Knowing this will help ease your standards when tying flies. I’ll explain this in more detail later in the post.

Fly-Tying Strategies

Let’s address some basic strategies for tying Crazy Charlies:

   Try to cover the hook shank with one full wrap of thread. This will give all additional body/ wing material something to “grip” onto when securing to the hook shank.

   When attaching eyes, don’t short yourself on space between your eyes and the eye of the hook. When placing the eyes too close, you effectively lose space for securing your wing material, weed guard, or other. Give yourself ample room to tie.

   When tying Crazy Charlies, consider three layers in the overall design of the body. Consider an under layer (thread color), middle layer (metallic or luminescent material), and outer layer (typically a see-through vinyl ribbing). These colors should be chosen to work well in the environment you plan to fish. The photo above depicts colors I’m using for Caribbean and South Pacific waters.

   Your under-layer should be consistent and complete. In other words, make sure you fully coat the hook shank with your thread color. This helps give your fly a consistent under-color.

   When it comes to your middle-layer or metallic highlight, don’t worry about having perfect spaced wraps. Having an asymmetrical wrap-job doesn’t really hurt your fly’s presentation. Again, the fish has a split second to identify the fly as being reasonable to eat. The fish isn’t going to care (or be able to perfectly see) if your tinsel wraps are parallel and perfectly spaced out. Most underwater species have asymmetrical lines anyway.

   Wing material should be chosen carefully. Neutral colors are a safe bet in most locations. Remember, less-is-more when it comes to wing material. Tying flies sparsely will typically generate more action in the water. Sparsely tied flies not only look more realistic, but also move through the air more efficiently.

   Tie in some Crystal Flash below or above your wing material. This offers some “fish scale” like movement to your fly.

   Try not to concern yourself with having perfect thread-wraps around your wing material. Again, with all the elements involved (surging water, sand, etc.) a fish isn’t going to catch the fact you have wing material sticking out from underneath your thread-wraps. Do however, try and trim the wing material so that fur/ hair doesn’t interfere with access to the eye of the hook. Any irregularities in thread-wraps can be softened with an extra coat of head cement.

Fly-Tying With Speed

In anyone’s first year of tying flies, there is an element of perfection the fly-tyer looks to achieve. Eventually this will disappear as you realize your irregular flies are catching the same if not more fish than your perfectly made flies. Realizing your irregular flies are just as effective will translate into not being so meticulous at the fly-tying vise and allow for volumes in no time at all.

If you are looking for new and different fly tying materials/ colors, check Amazon for bundles and combo packs. As time moves forward the options become more plentiful less expensive.

Collaborating is key with topics like this – if you have additional tips to help others speed up their fly-tying or help make a Crazy Charlie fish more effectively, please comment below!

Glassy Shrimp: Using Silver Lined Japanese Seed Beads


Recreate fly patterns at home! Materials used in making this fly have been included below. Always keep in mind your local fly-fishing store will most likely have the materials referenced, and typically for less. Materials can also be found at Amazon or any other major on-line resource.

Fly-Tying Materials

[list]
[list_item]Mustad Hook 34007SS (#2)[/list_item]
[list_item]UTC Thread 210, Tan[/list_item]
[list_item]Krystal Flash, Black/ Pearl[/list_item]
[list_item]Krystal Flash, Copper[/list_item]
[list_item]Krystal Flash, Fluorescent Fire Orange[/list_item]
[list_item]Japanese Glass Seed Beads, Silver Lined, 4 mm, Orange[/list_item]
[list_item]Japanese Glass Seed Beads, Silver Lined, 4 mm, Light Pink (looks gray however)[/list_item]
[list_item]Berkley Vanish, Fluorocarbon, 30 lb, Clear, Melted (dipped in Sally Hansen Black nail polish)[/list_item]
[list_item]Sally Hansen Hard As Nails, Hardener, Clear (#2103)[/list_item]
[/list]

Design Inspiration & Detail

I’ve been experimenting with these glass seed beads since MAY 2014. I went looking for something like a brass bead (having a small amount of weight) that wouldn’t tarnish. Stumbled upon these glass beads in an art store (Michael’s) and figured they might be the ticket. Beautiful part about them is the fact they are lined with silver – this really adds some longevity to their brilliance under water. Another great attribute is the fact they barley slide over the smashed barb on a #2 hook – this means they ride relatively tight to the hook shank. If tied properly, the beads also give some audible clicking when retrieving – the beads slide back and forth into one another.

Make sure to wrap the shank of the hook with thread at least one time – this will make it so the silver lining inside each bead will remain intact. The reflection does wonders for attracting fish. Some have asked how I get the flat surface when melting my shrimp eyes. I just recently started using Fluorocarbon. Melting fluorocarbon gives a smaller profile of eye and also yields a flatter surface.

For those interested in the relative weight of the fly: The five (5) seed beads used on the hook weigh one-quarter of a gram – this is equal to one set of Bead Chain Eyes.

Target Species

This particular fly was designed to attract Bonefish and Permit – many other species will also take the fly on a retrieve.